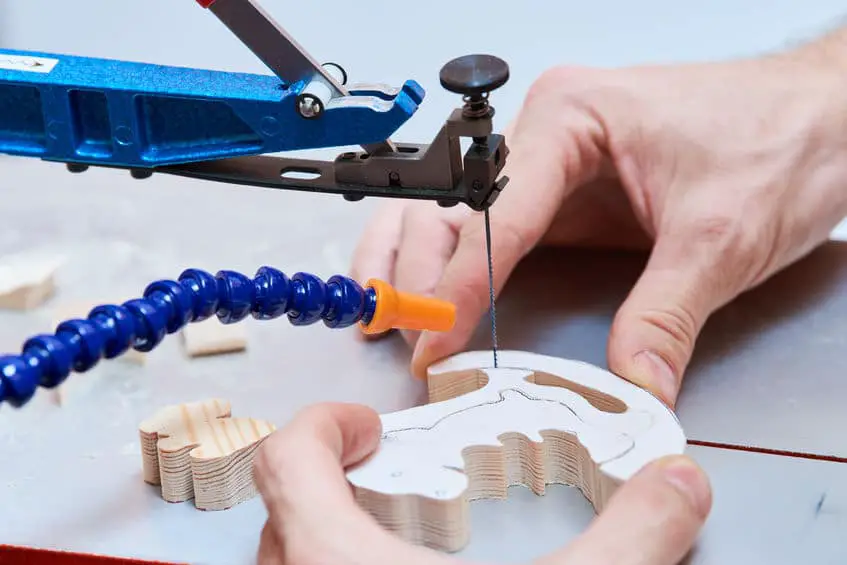
When properly setup, a scroll saw can be one of the easiest tools to use for cutting tight curves, thin materials, and inside cut-outs. With nothing but a drill and a scroll saw, you can create beautiful artwork out of nearly any wood and even some composite materials. So, how do you know when your scroll saw is properly set up? Many scroll saw masters will tell you that your saw should run like a sewing machine. What exactly does that mean?
Your scroll saw should be a joy to use. It should be stable and, while it’s impossible to remove vibration completely, it shouldn’t make your hands numb from the oscillation. If you are experiencing excessive vibration, there can be a number of reasons including the setup of your saw, and your cutting technique. In this article, I will try to help you understand and diagnose the problems you may be facing.
Bolt It Down
If you turn your saw on and it’s moving around the table on it’s own, you definitely have a problem. If your vibrations are that extreme, chances are there is something broken, or severely out of balance, that will be difficult to repair on your own. Your saw likely has a counterweight that is intended to reduce or remove these vibrations and it may not be properly balanced. I wouldn’t suggest trying to repair this on your own.
Some vibration is normal for your saws operation, so to help reduce the impact on your hands, you should bolt the machine down to a sturdy
bench. Attaching the saw to a large, solid mass will help by transferring the vibrations to the bench which will dampen the overall impact on your body. You don’t have to dedicate a permanent space in your workshop for the saw.
With thru-bolts, you can bold the machine down when using it and remove it for storage when needed. If you choose to make a dedicated station for your saw, ensure that it is built as rigid as possible with dense materials. The heavier the better!
Many woodworkers like to store their saw away and only bring it out on occasion. They set the saw on top of their assembly table and become frustrated that the saw is vibrating too much. While it would be much better to bolt the saw down, this simply isn’t feasible for everyone. Space limitations, and frequency of use are thoughts to consider when deciding if you are going to permanently mount your saw somewhere in your workshop. Not being able to bolt your machine down is okay!
Adding weight to the saw is one method many use to help reduce vibration. Sand bags, steel or lead weights, and even concrete can be used to add mass to your saw. Just like bolting it to a heavy workbench, adding weight helps to transfer minor vibrations away from the saw.
One of the easiest (and cheapest!) ways of adding extra weight is using sand or lead shot in a bag. To reduce vibrations on my saws, I have purchased some of these canvas bags on Amazon and then filled them with some sand I had in the garage. If you don”t have any sand, you can pick up these leads shots.Pack these bags around the base plate of the saw, but be careful to keep them clear of any moving parts or venting that is used to help cool your saw.
Concrete blocks or steel weights can also be used, but be aware that harder objects like these may induce annoying rattles if allowed to move about. Try using double-sided tape to help keep the heavy weights more firmly in contact with the saw to reduce noises.
If you have dog holes in your work bench, clamps are also a consideration for temporary mounting. A few clamps at the front and rear of the machine can be more than enough to secure the saw securely to your work surface. Anything you can do to increase the mass of the saw will help dampen those pesky vibrations!
Setup
Okay, so you’ve ensured that the counterweight isn’t out of balance, you’ve bolted the saw down and added lots of weight to the base, and you’re still getting annoying vibrations? What do you do? It’s time to check the setup of the saw. The easiest way of diagnosing this problem is watching the blade of the saw while you slowly move the saw through its cutting motion. Watch for the blade moving left to right and front to back.
Looking directly on while the saw is running, the blade should appear as a thin black like. If it is blurry, you may have it tensioned improperly, or your saw’s arm may need adjusting. You want the blade to run perfectly true left to right. Look for your manufacturer’s recommended adjustment procedure and perform the necessary adjustment to have the blade running true.
Some front to back movement is normal and necessary. As many scroll saw blades only cut on the down stroke, the blade will shift forward, into the cut, slightly to fully engage the teeth.
On the up stroke, the blade moves to the rear to clear the wood and extract dust and chips from the kerf. This front to back movement should be around 2/32″. If it is much more than that, you will need to adjust your saw’s setup. Again, perform the manufacturer’s recommended procedure.
Proper blade tension also plays a role in the vibration of your saw. If the blade is too loose, the top and lower arms will move out of sync with each other for part of their stroke. If the blade is excessively loose, your upper arm may even “slap” on each up-stroke which can also be heard. Chances are, if your blades are that loose, you will be breaking them long before your hands are tired from vibration. Consult your manual or recommendations from your blade’s manufacturer and set the tension properly.
Technique
I often find posts online relative newcomers to scroll sawing who have purchased their first machine and are having trouble with vibrations. Often, the response is to return it and purchase a different machine. In my experience, the machine is often not the problem; it is the users knowledge of proper scrolling technique. Many times, with just a bit of education and practice, the user will find that the scroll saw is performing perfectly.
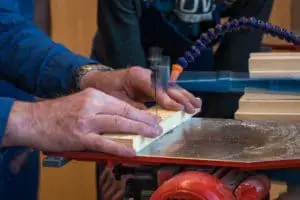
Holding the work piece firmly to the table is where we start. Then, the forward pressure you apply. You should not be forcing the material into the blade. It should be cutting effortlessly with only light pressure. Let the blade work for you. Pressing sideways, into the blade, can also cause chatter as the sides of the teeth engage your work piece. Sideways pressure should be reserved for making turns and corners.
The machines speed setting should be adjusted for the work piece you are cutting. Thickness of material, wood hardness, and laminations are all aspects to consider when you set your scroll saw’s speed. Setting the speed too low can cause the teeth to “grab” and pull on the piece as you feed it which will require you to hold more downward pressure than is comfortable. Practice is really the only way to learn what settings are best for you, the machine, and the type of material you are working with.
After you have properly adjusted the machine, weighed it down, and checked your technique, you should be able to work comfortably at your saw for hours. I hope you’ve learned something here that will help you make your time scrolling more enjoyable. Go make something beautiful!