There are two different methods for sanding your wood. Before you begin the process, it is important to know the difference between the two and decide which one is appropriate for the lumber you are working with.
Dry sanding is the first process and is appropriate for wood that contains high moisture content. Perhaps the exposure to a lot of rain left the wood wet, and you need to prep before any further work can begin.
Wet sanding is the other method that you may use for refining finishes on furniture pieces. Both of these methods have benefits of their own and enhance the quality of your wood in their own way.
When you are concerned about the general construction, you opt for dry sanding. On the other hand, when you desire an aesthetically pleasing appearance for your finished pieces, wet sanding is ideal. Wet sanding is also a more popular method for in-house projects.
Dry Sanding
You may use an electric sander for the dry sanding process. In this, you generally spark a handful of sawdust from your dried lumber. Many times, woodworkers also dry sand wood when they want to reduce it to the right size to fit their needs. They may also dry sand the wood in certain areas to hinge it and other similar processes.
With dry sanding, you are able to reach the soft layer under the top layer of the wood. The process usually breaks down wood that has less than 9% of moisture content. We use a percentage to generally express the usable material in the wood.
Many also refer to the dry wood sanding process as the rough stage. This may be because the process rids us of excess wood and shrinks the size to fit our construction needs. While dry sanding may give us smooth edges, it will not, however, give the wood a smooth-like-lacquer feel.
Woodworkers using dry sanding will generally never require above 100 to 180 grit ratings.
Wet Sanding
Wet sanding is wholly different from dry sanding. For starters, you cannot even consider using an electric sander in this process for any reason. Some people might try to pass off applying wet sandpaper sheets to the electric sander as a good idea, but you must never fall for it.
For wet sanding, you need to soak your sanding brick or sandpaper in water for approximately 24 hours. The only time you can consider a quick soak, such as for 15-20 minutes, is if you have a low- tier job or are perhaps short of time. However, the best practice is to soak your sandpaper for an extended period.
During the project, the wood is bound to accumulate sawdust, debris, and other particles on the surface. Therefore, lubrication is necessary to clear all that away, and water-soaked sandpaper is the perfect solution. In the end, you get a smooth and glossy finish on the completed project.
When you wet sand your wood in a project, the highest grit you may use should be around 200 to 2,000. The higher the grit, the finer your finishing will be, but you must also note that grit of 2,000 would not be easy to move across the wood. At the very least, a grit of that strength (without the electric sander, of course) will surely affect your efficiency.
We recommend soaking the sandpaper 24 hours prior to the process. The water in the sandpaper will help it move smoothly as it wipes away all impurities and previous scratches on the wood surface.
It is important to note that we only recommend soaking the sandpaper and not the wood itself. Your wood’s surface will air dry within no time, but if you make the mistake of saturating it, the fibers will expand and stand on end again.
Wet sanding is only best when you conduct it on post-finished products.
With the difference now clear, let’s look at details pertaining to wet sanding.
Can Wood Get Wet After Sanding
Before you sand the wood, you need to ensure there are no chances of rain. This way, your wood doesn’t face a risk of becoming wet. In case the wood does get wet before the staining or painting process, you will find yourself back to square one. You will have to wash and sand the wood all over again.
Now, if you own a deck floor, you may be considering hiring a huge floor sander to cover all of it. We strongly advise you against this because machines are usually heavy-weight and cannot reach the entire surface of your wooden plank. Floor sanders work best only for completely flat surfaces, but deck boards do features slight curves.
This means you will end up with a deck floor that has too much in some sections and too little in the others. Doesn’t sound too appealing now, does it?
The hard truth is that sanding with hand using a palm sander, belt sander, or sanding sponge is the best option. Of course, you will need competitive safety gear in place, including respirators and safety eyewear.
How Do You Prepare Wood For Sanding?
It takes considerable time, effort, and thoughtfulness when you undertake a woodworking project. Any negligence or rush on your part will have undesirable effects later, and your project will not have to kind of finish you envisioned all along.
- You need to be precisely methodical and thorough when preparing your wood for sanding. Start by allocating a work location where there will be zero interference, distractions, and traffic movement. Also, ensure your working space is safe from dust because you will have to leave your wood to dry every now and then while work is in progress.
- The drying process for your wood depends largely on evaporation. You have to ensure the temperature remains above 65 degrees F and humidity at 50% while the application and drying are in process. With higher humidity and lower air temperature, your project time will lengthen, and the wood will look tacky.
- Your products will emit fumes during the application and drying process. You need to make sure there is sufficient room for the fumes to disperse. If you work indoor, have a two-fan system in place to eliminate this problem.
- Turn your attention towards the wood. Look for loose joints, cracks, holes, or splits that you need to fix before you start staining and finishing the pieces.
- Use a wood filler to fill in the holes or cracks, smearing the wood. Smearing will only require additional sanding.
- Next, you need to start sanding the wood. Be as thorough as can be to remove scratches and minor nicks and also probe the pores open to allow more staining. Sanding also removes surface glazes.
- You must test any inconspicuous spot you notice on the wood with any product, material, or technique. This will prove the reliability of the wood piece to you.
- Use a stain wood conditioner to reduce the irregularity of wood pores. Using a conditioner before staining will also reduce the threat of blotchiness.
- Choose the correct sandpaper for your wood project. You must know that various degrees measure the coarseness of sandpaper in grits. Each grit rating is specific to the project type. Discuss it with the provider for a better idea of which sandpaper would be best for your needs.
- Dust is a menace. You must capture it safely with a bristle attached to your vacuum or just wipe it off with a damp cloth.
Benefits Of Wet Sanding
You get a number of benefits when you wet sand your wood. They include:
Dust Reduction
Wood surfaces tend to accumulate a lot of dust while to project in progress. Wet sanding effectively eliminates this problem and is common in the home interior projects. You will also find the wet sanding popular among the professional home interior painters who apply this technique before painting and in the middle of coats.
Fine Quality
When you desire fine quality and the smoothest finishes, trust wet sanding to give you that. With all the thickness you create using polyurethane, varnish, or sealant, a wet sander helps smooth out the little bumps and scratches from the surface.
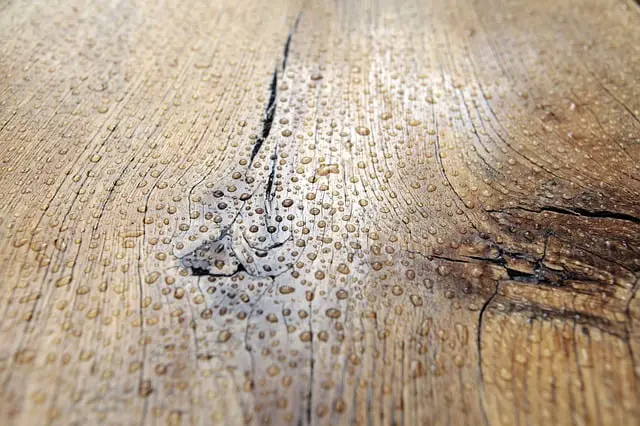
How Long Should I Wait To Sand A Pressure-Washed Clean Wood?
This largely depends on the weather, but generally, it takes around two or three days for the wood to dry completely after you pressure wash it. The pressure of the water causes fuzziness in the wood, so you must let it dry thoroughly before you sand the fuzziness away.
Final Thoughts
Wet sanding is the best way to give your wood project a smooth and refined finish. With the correct tools, sufficient time, and thorough methodology, you will have the most professional-looking pieces at the end of your project.