
Using pressure-treated wood for your deck next project means that it will be protected from common problems like insects and rot. But without care, the wood can age, crack, and dry out, leading to an unappealing gray color and splintered surface. By staining the deck you can extend its life and improve the appearance.
The staining process can bring its own complications if you do not have experience. Staining too soon can lead to the stain not being absorbed by the wood and result in a patchy and failed upgrade for your deck. Make sure the wood has dropped all of the excess moisture before trying to apply stain. Test to make sure that water is absorbed by the wood which ensures this drying process is done. After the wood is dry, it is ready to stain.
How Long Does It Take Pressure Treated Wood to Dry Out?
The great thing about pressure treated wood is that it will hold up very well to the elements. That positive translates into a negative when you are wanting to stain it. It can take quite some time for it to dry properly. In general, pressure treated wood will take two to three weeks to dry out, and you might have to extend that time depending on the humidity of the environment. During this time, you can make sure that you have all the tools you will need for the rest of the process. Choosing the stain color, picking up paint brushes or paint rollers, and readying your cleaning supplies are all excellent options to prepare for the next steps.
How Do You Know It Is Ready to Stain?
Pressure treated wood is ready to stain when it is no longer retaining the excess moisture from the treatment process. If you have bought premium pressure treated lumber, it can be stained as soon as you get it. It has already been prepared and all the moisture has been removed. If you have bought the lumber from a home center, then it is much more likely that it has not been prepared.
A simple test to check whether pressure treated wood can be stained is called the “Sprinkle Test”. Drip a couple of drops of clean water onto the surface of the lumber. If it immediately beads up and rests on top of the lumber, then you will have to keep waiting. If it absorbs into the wood within ten minutes, then you are good to stain.
Preparing to Stain
Pressure treated wood mainly protects the quality of the lumber from rot and insects, however it still can be marred by dirt and debris. Before staining, make sure you thoroughly sweep the area and remove all small pieces of dirt that could interfere with a smooth and even stain. Taking the time to also pressure wash or even hose down your wood will also get rid of any underlying debris 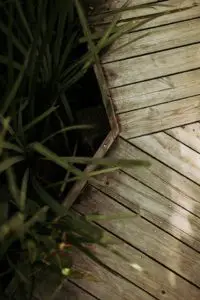 that will cause imperfections as the stain cures.
When choosing a stain for the wood, it can be good to keep a couple of things in mind. If you do not have much experience in staining wood or simply are not confident in a darker color, start with a transparent stain. Starting your staining process with a lighter stain means that any mistakes or second guessing can easily be covered up by another application of a darker stain.
Another thing to keep in mind is the amount of sun that the wood will regularly get. If it will be exposed to the sun most of the time, consider a lighter color that will reflect the sun and its heat rather than a dark color that will absorb it. If you stain with a lighter color, the heat will also be reflected. If you stain darker, the wood will absorb the heat.
Staining
After making sure that the surface of the wood is clean, the first thing you want to do is read the can of stain that you have selected. Regardless of quality, color, or type, stains can differ from each other in a variety of ways that slightly change the staining process. Before you put on that first coat of stain, make sure you have read the directions and you know what is going to be expected at each stage. As for actually staining, select your tool of choice. People have used paint rollers or garden sprayers for a quick and efficient application.
No matter what you choose, make sure to always have a paint brush nearby. The small nooks and crannies that a project can hide will make it hard to reach with larger tools. With a paint brush, you can pay special attention to each unique area that your wood has. A small tip before starting is to choose your exit route. Mark where you will be able to quickly exit the working area after staining and work towards that area. In doing this, you will not be walking over your hard work while its curing. After the stain has been applied, you simply have to wait for it to cure. Keep traffic on the wood to an absolute minimum and avoid putting furniture on it until it is completely dry.
Why and When Does Pressure-Treated Wood Turn Gray?
Pressure-treated wood can turn gray after long exposure to the elements. UV rays from the sun can cause the wood’s loss of color if it is exposed for too long. Similarly, if it gets rained on and 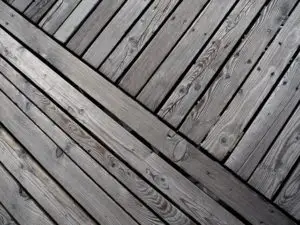 allowed to dry over and over without protection that can lead to it drying out and cracking. The staining process protects against both of these problems by reflecting the UV rays and by serving as a barrier to the rain.
Once the wood has been exposed to the elements to the point where it cracks and discolors, there is only a couple of things you can do. With the damage that the wood has sustained, a transparent stain is not going to come out perfectly. The discoloration and gray color will still show through and will not solve your problem. The best bet if you have old and weathered wood is to stain it with a semi-transparent or darker color stain. This will cover up much of the damage and will help protect the wood from further damage.
What Can You Do If You Stained Too Soon?
If you stained your lumber too soon and the stain did not take, then all is not lost. If you stained with a lighter color, it is easy enough to simply wait until the wood is completely dry and then reapply a darker stain. This is why it is recommended to start with a light stain! If you stained dark and it did not turn out the way you want to, then you will have to remove the upper layer of stain. Using light sandpaper, chemical stain stripper, or even fully refinishing the wood are steps that you may have to take in order to get it ready for your next attempt.
What Is The Best Stain to Use?
The most common response I get when asking someone why they chose a particular stain is – “Well, that’s just what (insert big box home improvement store name) had, so I grabbed some.” The brands that you can find at the large big box stores will do a good job. I’ve used them, and I have no major complaints. However, about 3 years ago, I tried a different brand. One that I had never heard of before, and I fell in LOVE with it! It is BY FAR the best stain I’ve ever used.
My go to stain nowadays is TWP Stain (Amazon link). It takes a lot to impress me, and this one won me over quickly. I used it to apply to our new deck. The deck was built in the late fall, so I waited until spring time to stain it. By then, it had dried out and was welcoming of the stain. TWP Stain went on fabulously. Now, 3 years later, it still looks awesome. It’s had very little fading, and it’s held up to foot traffic from 2 adults and 2 kids (plus all their friends).
Additional Tips
Here’s a few tips that I recommend everyone keep in mind when staining a piece of outdoor door:
- If you are staining something that will be walked on, take a belt sander to it. Just very lightly go over the surface layer of wood. I was able to sand our large deck in just a about 15 minutes. This will help get rid of any rough spots and splinters. I felt he 15 minutes of sanding was far easier than the time it would take pulling a splinter from my kid’s foot. You’ll be amazed at how a quick pass on a belt sander will smooth out the wood. If you don’t have a belt sander, you can pick this one up for less than $40 to get the job done (Amazon link).
- When staining a deck or a railing, the stain can drip down onto the surfaces below. Keep a paintbrush on hand to smooth out these dripping marks. No matter how hard you try to keep drips from occurring, they will happen. Once the stain dries, if these marks are left behind, they will be very visible darker spots on your beautiful wood.
- Before staining, make sure you cover any areas that you don’t want stained with painter’s tape or tarps. This can be done if the wood is close to the side of the house, a sidewalk, or planter’s boxes. Stain is very hard to get off of these surfaces without sanding or harsh treatment. Make less work for yourself later by protecting these surfaces now.
If you have any other tips for staining pressure treated wood, please leave them in the comments below!