When beginning woodworking, you may ask yourself: Do I need a planer or a jointer? Most times, this is followed by “What is the difference between a planer and a jointer?” There is no shame in being confused, everyone has to start somewhere.
Understanding the difference between these two machines is confusing. Both are used to modify the surface of wood, but do so in different ways. To an outsider, their differences may seem small and insignificant, but as any woodworker would tell you, there is a considerable difference between them.
What Is A Jointer?
Wood jointers are used to flatten the surfaces of twisted, warped, damaged, or bowed boards. Once the boards are adequately flattened, the jointer can be used to straighten and square the edges.
A jointer is a rotating cutter head that contains two or three blades in between two flat tables. The stock is pushed over the first table, or the infeed, and past the cutting head and onto the second table, or the outfeed. The second table remains the same height as the cutting head, while the first table is adjusted depending on the amount of wood that needs to be shaved off.
Jointers are equipped with a fence that squares up or bevels the edge of a board. The fence can be set in different positions for different purposes. When setting perpendicular, it will square up two adjacent planes of the board. When tilted, it can cut an angle on one edge of a board.
Once you get a full understanding of how these two machines work, you’ll quickly see how they can become a significant cost savings on your wood purchases. Once you are comfortable using these two machines, you can start purchasing rough cut lumber directly from sawmills and mill the wood yourself. This is significantly cheaper than buying wood from big box stores. For a more detailed look at this, you can take a look at an article I recently wrote titled “How to buy wood from a sawmill and save money.”
Why would I need a Jointer?
When I was trying to understand the difference between a jointer and planer, it finally clicked when someone explained it like this:
If you have a piece of true rough cut wood, it has no straight edge. Meaning, if you lay it on a flat surface you’re going to see gaps between the surface and the wood. The board is also likely to wobble. Before you can begin to square up the board, you need at least one straight edge. This is where a jointer comes in.
Below, I’ll explain how to use the jointer, but a jointer is going to give you a straight, even edge. Once you have that one side that is straight, you can begin to square the board. In fact, after getting one edge completely smooth, you’ll be able to run that edge against the fence on your table saw to square up the other side of the board.
After passing the board through your jointer and now your table saw, you’ll have 2 smooth edges. Therefore, the width of your board should be set (unless you decide to cut it into smaller widths later). Now you can begin working on the top and bottom surfaces. To smooth the top and bottom surfaces, you’ll want to use a planer.
This is just one scenario that I’ve described. There are several other instances that would call for the use of a jointer or planer. This particular one was the one that helped me understand how the two tools work together.
Using A Wood Jointer
The proper method of operating of wood jointer consists of standing on the side of the jointer that is opposite of the fence and placing the edges of the board facedown on the infeed table and butted against the fence.
When in position, the jointer can be started but before starting work, wait for the motor to get to full speed. Do not attempt to begin cutting until the motor is running at full speed as this can cause issues with the wood and damage the jointer.

Begin woodworking by applying light pressure onto the stock as you feed the board over the cutting head. Make sure to use enough pressure to comfortably and confidently control the stock.
After the front part of the wood has passed through the cutting head, begin to shift your weight forward and place a hand onto the stock by the leading end while continuing to move the board forward. As the stock approaches the cutting head, remove your hand from the stock and away from the cutting head.
Continue to move the board until it has entirely cleared the cutter. Once it has cleared, lift the stock and return it to its original starting position to begin another pass through. Each time the wood is moved through the jointer, the jointer will remove the same amount of material.
If the board you are trying to smooth out is extremely twisted or warped, the jointer will likely take off small patches of wood in the first few passes depending on your settings. With each pass, more wood is cut away until you have a perfectly smooth edge.
To help with being able to see where the high and low spots are on your board, it helps to mark them with a piece of chalk before running them over the jointer. You’ll just want to randomly scribble on the edge of the board that you are going to send over the blades. With each pass over the jointer, you’ll be able to see where the blades are cutting because your chalk scribble marks will disappear.
Buying a Jointer
There isn’t much difference in the design of jointers. They are all generally made in the same manner. The biggest differences between models are going to be the size and horsepower of the motors. The size and power of your machine will depend on what type of wood you typically cut.
If you find yourself squaring up stock to use to cut pens or small items on a wood lathe, you can likely get by with just a small 6” benchtop jointer. This model by WEN is a good unit and is the cheapest I’ve seen on the market. (Amazon link)
You should find yourself needing to cut larger boards, you’ll likely want to pick up a floor size model such as this one by Jet (Amazon link).Jet is a very well respected brand in the woodworking community, but as you’ll see, the pricing jumps significantly when you get a floor standing model. This is due to the amount of steel and cast iron that is made to produce the machines. Jointers are very heavy to help reduce vibration and movement during use.
Jointer Safety
If you’ve never seen a jointer before, it’s not the most intimidating looking saw. I think this is what makes it dangerous. Any new jointer than you buy is going to come with blade guards. If you buy a used model that does not come with blade guards, you need to buy replacements for it.
In addition to having blade guards on your jointer, it’s important to use some form of push sticks. When you push a board thru the blade of a
jointer, the blade is spinning towards you like a table saw. This significantly increases the risk of a kickback which is where the blade catches a board that’s not secured properly and throws it back at the operator in a split second.
Often, the kickback isn’t the cause of injury on a jointer because the operator is typically standing to the side of the machine. The injury comes from the reaction of the operator. The surprise of the kickback often causes their hands to end up in the blades which in the very least requires a trip to the emergency room for stitches. Worst case scenario is that the operator loses parts of their fingers.
A common set of push sticks for jointers look like these, which are an inexpensive option on Amazon. Many new jointers will come with a set of push blocks like these.
My personal preference is GRR-RIP blocks. These blocks come with a latch in the back that will release and make it easy to push the board thru the spinning blade. I like these push blocks because they give you the ability to add both downward and forward pressure as the wood is passing thru the blades.
Tips To Use The Jointer
Even though the tool has multiple safety features built-in, it is not foolproof, and you must still be cautious during use. Here are some tips for keeping safe while using a wood jointer:
- Keep hands and clothing away from the blades
- Double-check the spring-loaded blade guards before use
- Thin pieces of stock are harder to manage and may require slower work
- Use a feather board to hold the stock when necessary
- Make multiple shallow passes rather than attempting to make one large pass
- Read safety rules and instructions, especially if unfamiliar with the tool
- Wear head protection and safety glasses
If you begin to have doubts about how to use or how to proceed with your project while using a jointer, do not continue using until you have figured it out. Do not attempt to finish the project without doing the full amount of research or double-checking the instructions. If it is easier for you to understand how to operate tools by watching and learning, look up an instruction video on Youtube.
What Is A Planer?
A wood planer is a woodworking tool that is used to adjust boards to an even thickness, also producing a flat surface on both sides of the board. Traditional planers were mainly handheld tools, but have evolved into power placers that include a planing platform that provides an easy surface to make quick thickness adjustments that are controlled either manually or electronically. There are two types, handheld, and thickness.
A hand planer is a handheld planer that is commonly used in situations where the board is not movable either due to weight or an awkward shape. These planers are also used for wood that is too large to fit through a thickness planer. A thickness planer is best when the board is maneuverable and is usually used on thicker, or wider boards.
Using A Wood Planer
For the most part, planers all work the same way. They all have a cutting blade that is located within the middle of the tool that removes small layers of the wood. The cutter is similar to a chisel that runs down the length of a board but is much wider, allowing it to remove more material. The wood is trimmed by a controlled motion tool, creating a smoother surface after it has been but.
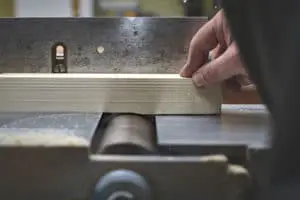
Set the first depth to be cut by adjusting the cutter head or drum, or by adjusting the planing platform. Once the machine is set, you may turn it on. Feed the board through the machine, it will be brought forward by an in-feed roller and moved underneath a fast-spinning blade within the cutter.
As the board is moved through the machine, it will be released on the other end. The outfeed roller will move the finished sections of the board out of the machine. The board will show a noticeable change, it will have a smooth and consistent surface and thickness across the entire board.
Types of Planers
Above, I mentioned how jointers all work and look the same across all models and brands. The opposite is true for planers. Planers come in many different forms and sizes.
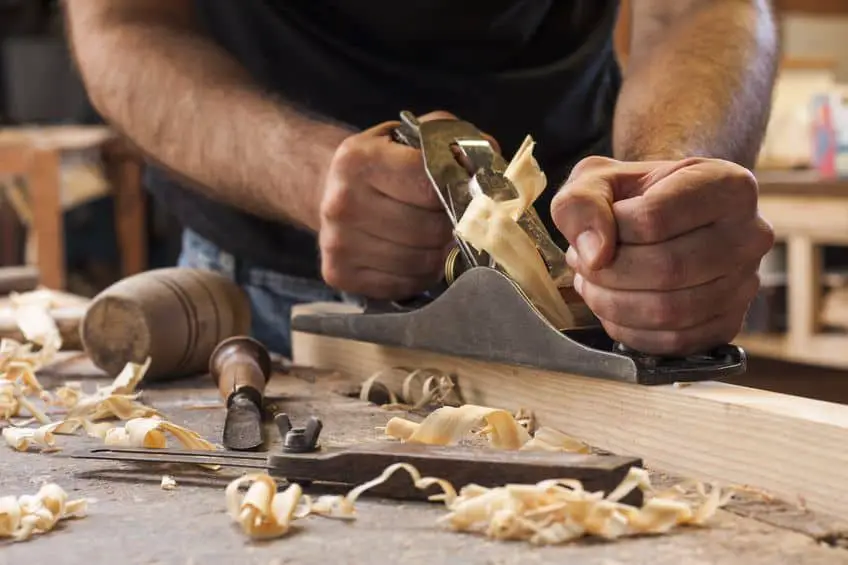
Hand Planers – if you grew up watching your dad or grandfather in their woodworking shop, odds are that you watched them use a hand plane. Hand planes have been around for a long time. They are often one of the primary tools that get passed down from one generation to the next due to their endurance and because of their popularity.
They come in several different sizes. It’s best to use the biggest hand planer that your wood can hold. This will save you a significant amount of time (and sometimes pain). Using a hand plane is very manual and labor intensive if you have large amounts of wood that you need to smooth.
 Even though they are much more manual to use, hand planers are still very popular in woodworking shops. These planes will give you much more control and precision that some of the quicker options that you will see below.
I’d recommend every woodworker at least pick up a couple to keep in their shop. It’s common to find these used on Craiglist and eBay. I’ve also had great luck picking some up at local online personal property auctions.
There’s a group of people that actually buy old used planers and refinishes them to make them look almost new. This can be a great option for someone new to them as allows you to learn how the planer works as you take it apart and re-assemble it.
If you are more interested in purchasing a new hand planer, I’d suggest getting one around 12” or 14” long. These are the most commonly used sizes. The 14” model by Grizzly (found here on Amazon) is a great one to start out with. This plane is very well made and will last a lifetime. The knob on it allows you to easily adjust the depth of how much wood will be removed with each pass. I also find the handle on this plane to be very comfortable as well.
Benchtop Planer – After hand planers, I’d say benchtop planers are the second most common type of planer that you will find in a shop. These are popular due to the speed at which they can smooth a board. The other great feature is that you can get a board to the exact thickness that you want.
These machines work by the operator turning a large handle on top of the machine that raises and lowers the cutting blades. The operator feeds the board thru the planer and a layer of wood is removed during each pass until their reach their desired thickness.
The one drawback to benchtop planers is their weight. Benchtop planers are portable and can be moved around if you don’t have an open spot on a table to bolt one down. I really like this planer by Dewalt. However, it weight 80 lbs, which is in line with other benchtop planers on the market.
If you have the shop space, I’d recommend getting a standalone table or cart for the planer as well. Dewalt makes this one for their line of products.
Electric Hand Planers – These models have gotten popular in recent years and makers have responded by bringing more options to the market for consumers. These planers are a step up over the manual hand planers that we discussed earlier.
They work very similar by the operator running the planer over the board to help create a smooth surface. If you decide to go this route, I’d suggest looking at this model by Bosch. It’s around the same price as some of the other brands such as Dewalt and Makita. However, this model is 6.5 amps of power whereas the models of the other two brands in this price range are only 3.5 amps.
Floor Standing Planers – These models are the least popular models found in small workshops. These planers are great, but they are massive and take up a considerable amount of space. Most models can easily handle wood up to 24” in width. Unless you are operating a serious woodworking business, it’s unlikely that you have a need for a planer this large.
Planers this size are also very expensive. A basic level 24” planer will typically start at around $2,500 for a new model. The price can increase quickly from there.
Tips To Safely Use A Planer
Wood planers are nifty tools for woodworkers to use, but they are not something that is easily picked up on by beginners. Like with all tools, they have built-in safety features, but still, require effort on the side of the user and owner. Here are some tips to safely use a wood planer:
- Research proper operating methods
- Avoid jumping in to prevent tear-outs, snipes, and inclined planes
- Determine which one is right for the project
- Practice with the machine before using on a project
- Wear safety gear
- Read the instructions and safety manual
- Identify the operational aspects of the tool
Although it may be tempting to jump right into the project, doing proper research on how to use the tool will save you both money and time. Figuring it out on your own will result in multiple mistakes that are best to make on practice boards rather than the boards that will be used for the project.
Which Tool Is Best For Your Project?
While both offer surfacing options, they are meant for use on different projects. Some projects will require the use of both tools, but that will be determined on a by-project basis and also depends on the boards that you are attempting to use.
When To Use A Jointer
There are plenty of opportunities to use a wood jointer during your projects and will be a tool that will provide you use throughout its lifetime. Wood jointers are best to use when:
- Straightening a bowed board or stock
- Squaring up a second edge to be perpendicular to the first
- Mitered butt joints along the length of the board
- Creating stopped chamfers on the edge
Once you become more familiar with operating a jointer, they can be used and experimented with for multiple different purposes. The jointed can be adjusted to cut angles, bevel edges, and straighter cuts.
When To Use A Planer
Planers are trickier to understand as there are so many different types and sizes. They all serve the same general purpose but have slightly different uses. These planers are best used for these jobs:
- Benchtop Thickness Planer: Best used for getting a new wood finish or removing a nominal thickness from the wood. Removes the thickness of wider lumber, normally 12-13 inches in width to 3 inches thick.
- Floor Models: Large units that handle large lumber, usually 15-24 inches in width
- Electric Hand Planer: Best for boards that are about 3 inches wide, and come in handy for projects that require mobility
- Manual Hand Planer: When you need more control over the amount needing to be removed
There are also a few subtypes that are used in different situations. Smoothing planes are used on finished planes and make the final etches in the workpiece. Jack planes are used to smooth out twisted and warped lumber, they are usually used first. Scrub planes are rough finishes on a plane, but take out more material than others.
Covering The Basics
Simply put, a jointer flattens a face or straightens an edge while a planer adjusts the thickness of the wood. You may need one or the other, or possibly both to complete your project. Understanding how they work and what they require is crucial in choosing which one is needed for your project. Neither are truly necessary, but they do make great time savers and are extremely useful if you’re planning to work with wood for a long period of time.
Even if you’re not planning on investing in either, knowing the difference will help you in the long run!
Additional Related Questions
Can I rent a jointer or planer? – Generally the answer is no, unless there is someone specific in your area that does it. The big box stores aren’t going to rent these machines due to how easily the blades can be damaged.
In addition, changing the blades can take a bit of time so the store isn’t going to take on the work. Putting the responsibility on the renter to change the blades out puts too much liability on the stores.