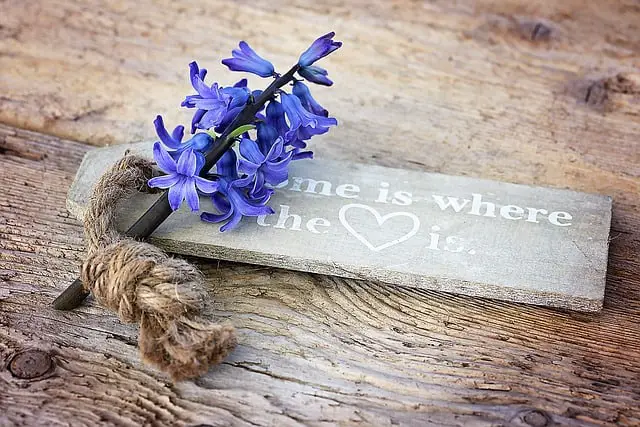
One of the most popular items for sale at craft fairs or shows are wooden signs. You can find a wide range of signs from weathered looking logos to beach signs to signs for a man cave. You may have assumed that you don’t have the necessary tools to ever make something like the items you see at these craft shows. However, you may be incorrect!
Surprisingly, it doesn’t take a bunch of fancy and expensive tools to make some great looking signs to that you can be proud to hang in your home. In addition, making your own signs can save you money as well. Plus, you get to tell visitors to you home “I made that!” when someone compliments your piece. In fact, perhaps you can take your hobby a step further and make some money yourself by selling signs or by at least making some Christmas and birthday gifts for others.
As with many DIY projects, there are a multitude of different methods, tips, and tricks for image transfers onto wood. In the sections below, we will showcase two distinct methods; one is for the direct transfer of inkjet printed photos, and the other is for pencil tracing with the intention of painting afterwards.
Method 1: Transfer of Inkjet Photo to Wood
This method is quick and efficient, and is best used for small images with a great amount of detail. As you will be printing your image to transfer directly, this method is not ideal for images larger than 8 ½” x 11”. If you have detailed photos such as family portraits or landscape photos you are trying to transfer, this is the method for you! Please note that if you cannot print using an Inkjet printer, you will need to use Method 2 instead!
Step 1: Gather materials
You will need…
- Piece of wood/ project surface
- Sandpaper, 60 or 80 grit
- Freezer paper (Amazon link)- Make sure you get FREEZER paper. Other types of kitchen paper won’t work!
- Inkjet printer and desired printable image
- Clear coat lacquer
- Scissors
- Ruler
It is important to use freezer paper rather than wax paper in order to ensure the best transfer of your image. Since the ink from the image is what will be transferred, laser printed images cannot be used (they will not transfer in this manner, but can be used in Method 2 instead!)
Step 2: Prep your transfer surface
If using an isolated piece of wood (to create a sign or wall art), lighter colored wood is the best so the image shows up with the most clarity possible. Sand with the grain of  the wood in order to create a roughened surface for the ink to stick to. If you are transferring your image onto a piece of furniture that has stain or finish, additional sanding may be required to remove this extra layer.
I recommend using very smooth wood as you are learning this process. It’s much easier to complete the transfer. You can pick up smooth pine wood from any local big box store. Some stores may also have a bargain bin that you can choose from. This can save you some money and allow you to practice without worrying about messing up an expensive piece of wood.
Step 3: Measure and cut freezer paper
In order to get a transferable image, the image must be printed directly into the freezer paper. Measure 8 ½ x 11” of the freezer paper and place into the printer’s paper feed tray, so that the image will print on the slick side of the freezer paper.
*Note: wax paper may be used but may not ensure as clean of a transfer and may jam in your printer.
Step 4: Prepare and print your image
The most important thing to remember in this step this that the image must be printed in reverse, in order for it to transfer correctly. It is almost as if you are printing a temporary tattoo- you must digitally make a “mirror image” of your picture and print this mirror image, so that once you transfer it to the wood, it will be oriented properly once more. Once you have printed the image onto the freezer paper, you are ready to begin transferring!
Step 5: Transfer image to wood
Now, your printed image is essentially a rub-on decal. Place the image face-down on the wood. It cannot be re-positioned once you have laid it down or the ink will smear, so make sure it is lined up how you would like it. Use the side of your ruler or other hard piece of plastic (such as a credit card) to smooth out the image onto the wood, starting at the top and moving from side to side. Hold the paper in place while you do this to prevent the ink from smearing.
Step 6: Remove the paper
The image has now been transferred to the wood! Remove the paper and admire your new image. If the ink smudged at all or a part of the image did not turn out as you desired, you can use sandpaper to remove that portion and touch it up by hand or try transferring again. Allow the ink to dry before moving on to step 7.
Step 7: Seal the deal
Once you are happy with the image, it is time to apply to clear coat of lacquer to preserve the image. Spray evenly across the image surface and allow to dry. And voilà, your image transfer is complete!
For a great video that shows you exactly how to complete this process, check out the following video:
Method 2: Transfer of Non-Inkjet Images to Wood
This method is effective for any image which is not printed on an Inkjet printer. Images transferred with this method can be any shape or size. This method is best used for larger images and/or images with less detail, though you can use any image- it may just take longer to transfer with greater detail. If you have quotes, simple designs, or messages to transfer, this is the method for you!
Step 1: Gather materials
You will need…
- Piece of wood/ project surface
- Printed image
- Masking or painter’s tape
- Paint and small brush, permanent markers, paint pens, or whatever medium you plan to use to fill in the traced image
- Pencil
- Optional: light box or window
- Optional: sandpaper
Step 2: Set up
If using a light box, place your printed image face-down on the light box, and secure with tape. If using a window in place of a light box, tape the image face-down onto the window. If neither are available, place the image face down on a flat-surface in a well-lit area.
Step 3: Create the mirror-image
Using the pencil, trace and shade in the outline of your design as it shows through the paper. You do not have to perfectly trace the image; you are essentially making your image into a carbon paper tracing, so coloring outside the lines in this case is preferred!
*Note: pencil works best for transfers to light colored woods. If using dark colored wood, consider tracing with chalk. Also, if transferring an image onto pre-stained or finished furniture, sand the surface as mentioned in Method 1 prior to step 3.
Step 4: Carbon transfer
Remove the design paper from the light box, window, or flat surface. Tape the design paper (image facing up) onto the wood, positioned exactly where you want the final image to be. Use your pencil to firmly trace the outline of your design. This will leave behind a penciled outline of your design on the wood, so this time you want to be as accurate as possible and pay attention to detail.
Step 5: Finishing touches
Remove the paper to reveal the traced outline of your design. Using paint, permanent markers, or paint pens, color in your design. This is your chance to get creative- if you want to change the colors of the original designs, or perhaps add words or a border that was not in the original image, you can! The only limit is your imagination.
As I mentioned before, there are numerous gifts and projects you can make using these steps. Here’s some ideas for projects you can use to showcase your new design transfer skills!
Project ideas:
- Housewarming gifts
- Wedding signs
- Christmas ornaments
- Photo shoot props
- Gallery wall art
- Welcome signs
- Family tree
- DIY beanbag toss boards
- Much, much more!