Woodworking is becoming more and more popular each year in the United States. Sites such as Etsy and Pinterest have made wood projects that seemed impossible now look easy with the detailed plans that are available nowadays. Growing up in my dad’s shop, I watched as he made tables and benches from the “pictures” held in his head. On occasion, he might indulge in the purchase of a mail order project plan. Even then, he had to mail a check off and wait for the package to arrive – usually 6 weeks later.
Now, users can log onto Pinterest and find 10 different versions of the desk they like complete with material list and easy step by step instructions. This ease of use though, comes with a price. Unfortunately, not everyone takes the time to learn how to operate the new power tools they are purchasing for these projects. The number of injuries caused by power tools is increasing. Below we cover some of the most dangerous tools and how you can remain safe and you grow your woodworking hobby.
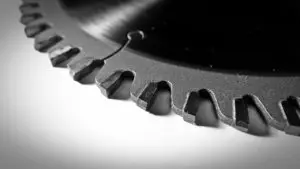
Table Saw – 80,000 Injuries
In 2011, the National Electronic Injury Surveillance System (NEISS), release a report that focuses on table saw related injuries from 2007 and 2008. That study found that there were approximately 80,000 emergency room visits each year due to table saw injuries. Total ER visits related to a saw related accident was estimated at 102,000. This means that more than 78% of saw injuries occur when using a table saw.
 The most common Injuries were lacerations (64.8%) and fractures (12.2%). Sadly, 10.5% of the people in this report, were forced to amputate a body part, which was typically a finger or hand.
In about 40% of the cases that were reviewed, the injured individual reported a material kickback was the reason for the injury to occur. A kickback can occur due to a couple of reasons. The first is when an individual is cutting a piece of wood and the material turns just enough to become pinched between the saw blade and the fence. Due to the fact that a table saw blade is spinning at over 100 mph, it grabs the piece of wood and shoots it towards the saw operator in just a fraction of a second.
The second scenario that can produce a kickback is when the material lifts off the table. The change in how the material is feeding into the blade can cause the blade to again launch the material back at the user. If you are interested, here’s a great 5 minute video where a guy purposely recreates a kickback. Link to video.
Safety Precautions
Featherboards – A featherboard is a piece of equipment that locks onto your table saw using the miter slows. They come in many different sizes and shapes, but generally the user will lock them into place turning 2 knobs. One side of the featherboard has spring like feathers or “fingers” that press against the material being cut. As the user pushes their material thru the saw blade, the featherboard will ensure the wood passes thru the blade evenly and remains against the fence. Since the feathers are at an angle, this creates additional pressure which helps keep the wood from being sent back towards the user. It is important to note that a featherboard does not prevent kick backs from occurring, but it does help reduce the risk.
Blade Guards – A saw blade guard is made to enclose the blade to help protect users from coming into contact with the blade. Typically the guard is made of a clear plastic so you can see thru it. The front of the guard is angled so that as you push your wood towards the blade, it will raise. Once the wood has passed through, it will then lower back down on it’s own. Almost all tables saws, when purchased new, come with a saw blade guard. Unfortunately, this is typically one of the first modifications done to a saw because users feel they “get in the way.”
Push Stick– A push stick may be the cheapest safety tool you can make on your own. It really just take a scrap piece of wood around 1x2x12″. There are several plans available online or you can always buy one. The push stick works by allowing the user to push the material through the saw blade all the while keeping their hands and fingers about 12 inches from the saw blade. The more distance that you can keep between your hands and the blade the better.
Push Block – A push block is very similar to a push stick but it usually sits on top to the wood, though it can be used to push material once most of the material has made it’s way through the blade. The push block is created with gripping material (similar to the rug gripping material used to keep rugs from moving on hardwood floors) on the part that comes into contact with the wood. This allows the user to apply pressure from the top of the wood which will help prevent the wood from rising off the table. Again, you can find numerous push block plans online to build your own, but there are several nice ones online for purchase as well.
Zero Clearance Inserts – Your table saw comes with a standard throat plate installed. The throat plate is the small oval metal part that surrounds the actual saw blade. When looking at it, you will notice there is a considerable gap on all sides between this plate and the blade. It’s designed this way by the manufacturer so it can handle any heights or angles that you need to cut. The problem with this, is the large gap that is creates because wood can splinter or get caught as it’s passing through the blade. A zero clearance insert takes away that gap – however, it also takes away the ability to change the height and angle of the blade unless you change out the insert.
SawStops Table Saws – The most expensive item on our list is the SawStops table saws. These units were created in 1999 and hit the market soon after. Steve Gass is a patent attorney and physicist, but does woodworking in his free time. After recognizing the dangers a table saw presents and the fact that it’s estimate 10 amputations per day, he set out to solve the issue. After a couple of weeks of trying different designs, Steve created a saw that automatically applies a brake to the saw blade within 5 milliseconds of a person’s finger or other body part comes into contact with the blade. To offer some perspective, it takes about 350 milliseconds for a human to blink their eye.
According to the SawStops’ website, their design works by sending a small electrical signal through the saw blade, once the blade comes into contact with human flesh it activates the braking system due to the break in the electrical current in the saw blade. Mr. Gass was so confident in his invention, that he conducted a live demonstration – using his own finger! During the test, he slow moved his own finger into the saw blade and just as he expected, the machine quickly stopped. Here’s a link to a demonstration: Click here.
The SawStop saws are not cheap. They have 4 primary categories that can be custom built to suit your needs. The basic portable jobsite version starts at $1,299.
Goggles & Ear Protection – As always, these two items should be used no matter what equipment you are using in your shop. Goggles shoud be used to protect your eyes from the dust to ensure you can focus on the wood passing thru the blade. Prolonged exposure to loud noises can affect hearing. Personally, ear protection also helps me focus and reduces the likelihood of one of the kids coming into the garage and scaring me with a slamming door while I’m in the middle of a cut!
Circular Saw – 20,000 Injuries
The second most common accident in a shop is due to mishaps involving a circular saw. A circular saw is an extremely versatile tool. It’s useful in a number of situations around the house even if you aren’t a woodworker. It’s also used on pretty much every job site imaginable. Odds are if you’ve lived in a new construction neighborhood you’ve been awaken early on a Saturday morning by a builder using one on a house.
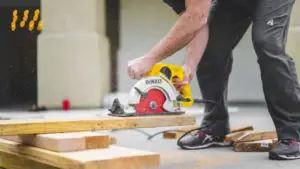 Though these machines are small and may not look intimidating, they pack a lot of power. On average, at full power the blade on one of these saws is spinning at approximately 120 miles per hour. Add on to that, the operators fingers and hand are at rest no more than 3-4 inches from the blade at any time during engagement. It’s no wonder there are 20,000 accidents per year requiring a hospital visit. In fact, it is rather shocking there aren’t more ER visits.
Safety Precautions
Good Grip – The first thing you can do to prevent issues when using your saw is as simple as making sure you have a firm grip on your saw during operations. Circular saws come with handles in 2 locations – one so that your finger is positioned near the on/off switch and a second grip on the front side of the saw for your other hand. It’s easy to be temped to only use the grip that is near the on/off switch. However, not only is holding the front grip safer, it also ensures a consistent and straight cut.
Path is Clear – Today, there are several options when buying a circular saw, including battery operated variations. These models eliminate the cord from laying on the ground which increases the risk of a tripping hazard. Once I have everything lined up, I’d gotten in the routine of checking the ground around me for tripping hazards. I check not only where I’m starting my cut but also my entire walking path in the cases where I’m cutting a long board such as a sheet of plywood.
Wood is Clamped – Just like a table saw, a circular saw is at risk of kickbacks if the perfect conditions present themselves. All it takes is for a board to be poorly held down and the blade of the saw getting pinched due to a slight turn or twist of the wood. Just as with a table saw, this will cause the loose board to turn into a makeshift missile that will hurl itself towards the operate. The kickback occurs so quickly that it is impossible to foresee it coming or react to it when it does. It is very important to make sure the boards you are cutting are firmly in position and not susceptible to movement. This can easily be accomplished with just a couple quick clamps on both ends of your board.
Nothing on Intended Path – Another thing to look out for prior to cutting is objects in the path of your saw. It’s easy to check the top of the surface you are about to cut for objects being in the way. However, it’s just as important to check what’s under your path as well. I have run into numerous instances where I’m about to use the saw and give it one last look over before powering up. It’s those times that I find my intended path would have taken me over my saw horse (I use metal ones) or over the jaw of a clamp.
Blade is at Correct Height – Always ensure that your blade is set to the correct height when prepping your saw. Just like a table saw, the general rule of thumb is that the blade should clear the bottom of your cut by one tooth length. It’s important to ensure the blade clears enough of the surface to ensure it’s able to push the dust and cut material away from the board. Having too much blade sticking out causes a safety risk that increases the chance of a finger getting cut by grabbing a board or someone’s thigh being under the blade as it passes by.
Blade Guard is in Place – Lastly, ensure that your blade guard is engaged correctly before starting your cut. The guard should be free moving and raise and lower on its own. It operates so that as your saw begins moving over the wood it pushes up and to avoid interfering with your cut. Once it has passed through the wood it will lower automatically protecting yourself from the blade as it slows after disengaging the power button.
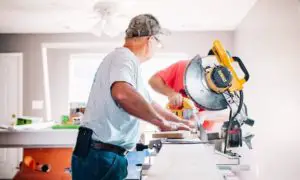
Miter Saw – 7,000 Injuries
Miter saws are probably the 2nd most common saw we will look at behind the circular saw. Many households own one of these saw even if they aren’t practicing woodworkers. These saw are extremely portable and versatile for quick and easy crosscuts which make them a must have for any significant sized projects such as constructing a fence or deck.
Safety Precautions
Keep Hands Away – Always keep hands a minimum of 6″ away from the blade at all times.
 Solid Clamp – If your budget can handle it, I would suggest picking up a miter table stand that comes with adjustable rollers to help hold your pieces in place. It is important that your wood is held firmly against the fence during cutting. Never cut small pieces of wood on a miter saw as it can splinter and or shatter due to the power these saws possess.
Correct Blade – Never use a blade larger than what your owners manual recommends.
No Gloves – Make sure when operating a miter saw that you have nothing that can get tangled with the blade such as gloves, shirt sleeves or even jewelry. Should any of these items get caught by the blade during operation, they can cause your hand to get pulled into the blade, thus causing injury.
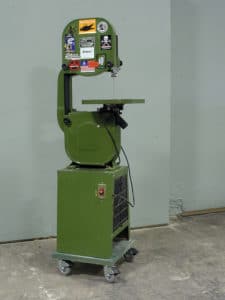
Bandsaw – 4,000 Injuries
A bandsaw is a key tool in a woodworker’s shop. It’s the only saw that can easily rip a board that is several inches thick (a 12″ table saw can cut about 3.5″ thick). The overall design of a bandsaw has not changed since its early designs in the mid 1800’s. Bandsaws are used in a wide range of industries and not limited to just wood. In fact, they are often used in metal fabricating and even in meat processing facilities.
The bandsaw may not appear intimidating or dangerous in looks, however it is responsible for about 4,000 ER visits per year. There is no risk of kickbacks on a bandsaw because the direction of the blades are in a downward motion rather than the spinning motion that you find with table saws. Though the risk of kickbacks are eliminated there are different risks that these saws present. Below are our tips to stay safe when using these saws.
Safety Precautions
Tight Blades – Bandsaws operate different that just about every other saw in the shop. The blade on a bandsaw is a tightly fitted to two large pulleys inside the machine. That motor turns one of the pulleys thus resulting in the spinning of the blade. The tension between the blade and pulleys is very important. Different sized blades required different levels of tension. It’s important not to over or under tighten the blades. Be sure to consult your owners manual to ensure you have the tension set correctly for your needs.
Blade Guard – The blade guard is a small adjustable attachment that sits where the blade first becomes visible as it moves towards your table. The guard should be adjusted so it sits about 1/8 of an inch above the wood that you are cutting. Adjusting the guard will ensure less of the blade is exposed during cutting which in turn reduces the risk of a hand coming into contact with it.
Blade Care – As with all saws, it is necessary to ensure the blade you are using is sharp and in good condition. It’s also important to ensure you are using the correct blade for the cut you are performing. Bandsaw blades come in different thicknesses and with varying teeth per inch (TPI). These two factors determine how sharp of a turn you are able to perform with your blade. A blade with a low TPI should be used for ripping boards quickly. Higher TPI’s will allow you to cut twists and turns as needed. You should not try to cut a board that will require extensive sharp turns with a blade that has a low TPI count.
Pull vs Push – One of the biggest risks to using a bandsaw wood getting pinched or jammed during cutting. The most common accident occurs when the user is pushing a board through the blade and it becomes stuck. Commonly, the user will begin applying additional force to get the wood unstuck. The problem occurs when the wood suddenly becomes unstuck and the user’s hand is forced into the blade. Many times deep cuts or finger amputation is caused within a split second.
When you first begin your cut, it is advised that you use a push stick or push block. Once you’ve cut enough of the wood where there is several inches that have passed through the blade, you can transition to the other side of the blade and begin pulling the wood through the blade rather than pushing it.
Properly Maintained – Due to the design of bandsaws, the internal housing of the machine is prone to a build up of sawdust and wood chips. It is advised to remove the housing cover at regular intervals to vacuum out the dust and chips to ensure they don’t interfere with the saws performance.
Their design also makes the machine susceptible to wood chips getting caught near the area where your blade and table come together while cutting. A small wood chip can make prevent you from being able to move your stock thru the blade. You may be tempted to use your finger to dislodge the splinter or chip but elect to use a scrap piece of wood instead. Grabbing even a small piece of wood can be dangerous as it could potentially shift and pull your finger and hand into the blade.
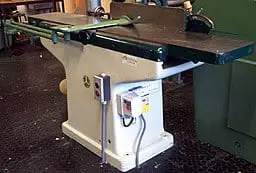
Jointers and Planers – 15,000 Injuries
These two machines are often grouped together and often confused as being the same; however they are in fact two separate machines. Jointers and planers are most often used to mill lumber that has been purchased from a saw mill. Generally, it’s going to be more seasoned woodworkers who are using these tools. Though the average experience level for operators of these machines may be higher than some of the other saws we’ve looked at, these two machines account for approximately 15,000 hospital visits per year. Most of these injuries are due to hands and fingers coming into contact with blades. Eye injuries are also common as well.
Safety Precautions
Grain Direction – Always make sure that you are feeding wood thru the planer or over the jointer in the direction of the wood grain. This will help reduce the risk of a kickback.
Eye & Ear Protection – Both of these machines produce very loud noises during operation. As with any saws, ear protection in one form or another should be used at all times. Both of these machines also produce a considerable about of dust and wood chips, therefore eye protection should be worn at all times as well.
Watch your Hands – Jointers come with guards attached to the machine that will automatically move away from the blade as the stock moves across the blade. Ensure your hands remain away from the blades at all times. During the use of a planer, NEVER reach into the planer. The blades in a planer are often not visible due to the design of the machine. Reaching into the machine while it is powered on will cause serious injury.
Push Blocks – Again, push blocks are highly recommended when using a jointer. Due to the blades rotating towards the operator, the machine is at risk for created kickbacks that will send the stock back at the user. Using push blocks allow the operator to apply a downward pressure to reduce this risk.
Radial Arm Saw – 500 Injuries
The radial arm saw was developed in the early 1920’s by Robert Dewalt. This saw grew in popularity for several decades reaching it’s peak in the late 1950’s and on into the 1960’s. The saw began it’s decline in the 1970’s when the miter saw was introduced to the market. Today, the radial arm saw is widely viewed as a tool of the past in the woodworking world. At the time of this writing, most of the main tool retailers don’t have a radial saw listed on their site. The decline of its popularity is the reason that it only makes up 500 ER visits per year.
Odds are if you have a radial arm saw or have access to one, it’s several decades old. Of all the woodworkers I interact with, I can’t tell you one person that has purchased one of these saws new. They can easily be found on Craiglist for a couple hundred dollars.
The primary marketing feature of the radial arm saw was the fact that it was “several saws in one.” It can do most of the same cuts as a table saw and miter saw including some dado cuts.
Safety Precautions
Power off during adjustments – Since radial arm saws are made to be versatile, there are several knobs and levers on the machines that are needed to make adjustments depending upon the cut you are needing to make. Before operating one of these saws, it’s necessary to read the owners guide to understand what each of these adjustment change on your machine. Feeding a piece of wood through the machine in the wrong direction can cause serious problems and injuries.
When making adjustments on your saw, it is highly recommended that you engage a kill switch as an additional layer of protection to avoid your saw turning on while you make your changes.
Use Sharp Blades – A radial arm saw is very prone to kickbacks when ripping a board. The risk of a kickback increases if the blade you are using is dull. It is very important that you perform routine maintenance on these machines and check your blade quality before performing a rip.
Full Speed – Before moving the blade of your machine into your wood, ensure that the blade has reached its full speed and power. Moving the wood into the blade before it has reached its full power can increase the risk of a kickback because the blade is more likely to become pinched.
Use Push Stick – Just as with a table saw, the use of a push stick is highly recommended when ripping on one of these saws. A push stick will allow you to stand to the side of your board as you push it thru the path of the blade.
Watch Where You Stand – Since radial arm saws tend to have kick backs more frequently, its always good to make it a habit of not standing in direct line of the wood as it passes through the blade. Standing to the side of the board (and ensuring no one else is in line of the board) will ensure you are safe in the event a kick back does occur. As stated earlier, a kickback is strong enough to send a board through a wall.
Conclusion
It’s quite obvious that anytime you turn a power tool on that you are at risk for an injury. This risk can be significantly reduced by learning your machines and installing various safety precautions. With the ever growing use of YouTube, it’s almost impossible to not find a video demonstrating a power tool that you’ve recently acquired. Prior to using any new tool, make sure to do the proper research to ensure you know how to correctly and safely use it.